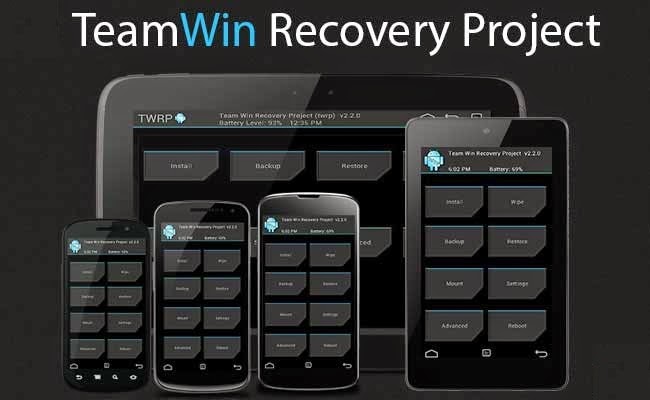
Showing posts with label Custom recovery. Show all posts
TWRP custom recovery for Samsung Galaxy S6

TWRP custom recovery for Samsung Galaxy S6

A custom recovery is the world to some beautiful custom ROMs and to ROOT your device.
If you agree with me then you do understand the need of a custom recovery for a device.
That is why we have brought you TWRP custom recovery for Samsung Galaxy S6.

WARNING:
Installing custom recovery on your device may VOID your warranty and may delete all your data.
Before proceeding further you may consider backup your all data.
Understand the fact that you are the only person responsible for everything that you do with you device.
If you blame me for a disaster that happened to your device then I will simply laugh at you.

Before going for the flashing make sure that you have the following things in hand to start with:
- Recovery image for your corresponding device from the following links:
      TWPR recovery .tar file (ODIN flashing)
      TWPR recovery .img file (If device is pre ROOTED)
- USB cable and USB drivers
- Enough time with a smart and cool brain

Flashing a Custom Recovery:

ODIN Flashing

STEP 1:
Power off your device.
Turn on your device using the proper key combo to get into download mode and attach the device to your computer via a USB cable.

STEP 2:
Use the PDA tab or button to browse to and select the .tar file that you downloaded and flash the device.

If you have already a ROOTED S6 then follow as below:

Run the following commands via adb shell or a terminal emulator app:
$ su
# dd if=/sdcard/twrp.img of=/dev/block/platform/15570000.ufs/by-name/RECOVERY

[RECOVERY] [TWRP] [CWM] Yu Yureka rooting guide, unlock bootloader and Custom recovery installation

Rooting-micromax-yu-yureka

A custom recovery is the world to some beautiful custom ROMs and to ROOT your device.
If you agree with me then you do understand the need of a custom recovery for a device.
Micromax Yu Yureka was recently released to market and today we have CWM and TWRP custom recovery for the same.
Although this device comes with CyanogenMod pre-loaded out-of-box but there are also some other good ROMs you can try on youor device and you can enjoy the benefits of rooting a device.

WARNING:
Installing custom recovery on your device may VOID your warranty and may delete all your data.
Before proceeding further you may consider backup your all data.
Understand the fact that you are the only person responsible for everything that you do with you device.
If you blame me for a disaster that happened to your device then I will simply laugh at you.

Before going into details make sure that you have the following things in hand to start with the installation guide.
Required things:

- Recovery image for your corresponding device from the following links:
      TWPR custom recovery for Yu Yureka
      CWM custom recovery for Yu Yureka
      Philz recovery for Yu Yureka
- Fastboot and adb binaries
- SuperSU v2.27 Flashable package by chainfire
- USB cable and USB drivers (USB drivers will be automatically installed on a Windows machine after connecting the device using usb cable)
- Enough time with a smart and cool brain

You may follow the below link to backup all the data on your android device:
Step by step guide to take full backup of your phone data

STEP by STEP ROOTing guide for your Yu Yureka:

The complete process will be split into three things as following:
- Unlocking the Bootloader
- Installing a custom recovery
- Installing the ROOT package using a custom recovery

Unlocking the Bootloader:

STEP 1:
Turn the phone off.
Then boot it into the bootloader/fastboot mode by holding volume up + volume down + power.

STEP 2:
Open a command console and go to the directory where you have extracted adb and fastboot
Type the following command in the console:
$ fastboot devices

NOTE:
This command will list the connected devices.
If your phones serial number shows up you are good to go and may continue.
If the phone is NOT listed this indicates that your drivers are not installed correctly.
In order for you to continue you must configure your drivers properly so that your phone is listed under fastboot devices.

STEP 3:
If the phone has been recognized by the command above, proceed to unlocking the bootloader with the following command::
$ fastboot oem unlock

WARNING:
Remember that this step will wipe EVERYTHING off the phone.
If you have not taken a backup of your phone data then do it here:
Step by step guide to take full backup of your phone data

Flashing a Custom Recovery:

STEP 1:
Find out the appropriate custom recovery for your device.
Copy the custom recovery into the directory where you have kept the adb and fastboot files.

STEP 2:
Now type the following command to install the custom recovery image onto your Nexus device:
$ fastboot flash recovery <recovery_image_file.name>
Place the recovery image name in the <recovery_image_file.name> field.
$ fastboot reboot

Rooting guide:

NOTE:
Rooting guide will only work only after the custom recovery installation.
If you will SKIP the custom recovery installation process and perform only these steps then rooting will not be done.

STEP 1:
Copy the SuperSu zip file to your phone (By using a USB cable or via adb push command).

STEP 2:
After copying the SuperSu zip file to your SD card you have to go to the recovery and there you have to install this zip file.
Press vol up + vol down + power button to go to recovery

Or use the following command in a command console:
$ adb reboot recovery

STEP 3:
Select Install zip from sdcard option in your recovery.
Select the SuperSu binary zip file where you have kept in the SD card.

Enjoy the rooted yu Yureka and all that rooted features and all beautiful custom ROMs for your device.

Have fun and stay tuned to get more updates.

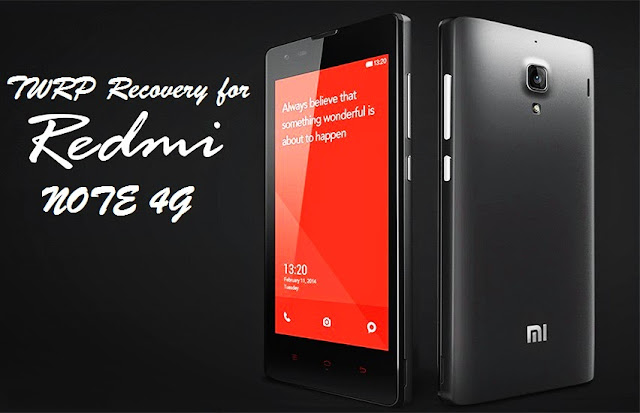
[CUSTOM RECOVERY] TWRP 2.8.1 recovery for Xiaomi Redmi NOTE 4G

twrp-recovery-for-xiamoi-redmi-note-4g

A custom recovery is the gateway to most of the beatiful Cutom ROMs around, like: CyanogenMod, LiquidSmooth, Paranoid Android and lot more.
Now the Xiaomi REDMI NOTE 4G users can enjoy such Custom ROM experience because they have the Custom Recovery ready for their device.
TWRP custom recovery for the Xiaomi REDMI NOTE 4G users is presented by miui user juliusssss.

WARNING:
installing the Custom Recovery may lead to VOID your WARRANTY and may erase your data.
Be informed that I cannot be held responsible for your bricked device or if anything goes wrong.

Please follow the link for how to backup all the data on your android device:
Step by step guide to take full backup of your phone data

Required files for this installation:
- The TWRP recovery image for your Xiaomi Redmi NOTE 4G (Device codename: DIOR)
- Fastboot and adb binaries needed only for METHOD 2
- USB cable and USB Driver needed only for METHOD 2.

Flashing TWRP recovery image on Xiaomi Redmi NOTE 4G:

METHOD #1:
Installing TWRP recovery Without a PC

STEP 1:
Download the recovery zip file and copy it to your SD card or internal memory.
Rename it to update.zip

STEP 2:
Turn off your phone and enter into your stock recovery by pressing Volume up and power button.

STEP 3:
Select the Install update.zip from sdcard option in your recovery and all DONE.

METHOD #2:
Installing the recovery using a PC

STEP 1:
Unzip the fastboot and adb binaries and save it in some folder in your PC.
Now download the recovery zip file, extract the recovery.img file and copy it inside the fastboot and adb folder.

STEP 2:
Open a command console and enter into the directory in the console where you have adb, fastboot and the recovery image.
Type the following command in the console:
$ adb reboot bootloader

STEP 3:
Type the following command that installs the TWRP recovery image to your device:
$ fastboot flash recovery recovery.img
$ fastboot reboot
After successful completion of the above commands your Redmi NOTE 4G will have the TWRP recovery flashed and your phone will be rebooted.

Have fun and stay tuned to get more updates.

[RECOVERY] [TWRP] Official TWRP Custom recovery installation guide for Micromax Canvas Magnus / Canvas A117

A custom recovery is the world to some beautiful custom ROMs for your device.
If you agree with me then you do understand the need of a custom recovery for a device.
Micromax Canvas Magnus was recently released to market and today we have the TWRP custom recovery for that.
With this first custom recovery you will also see some custom ROMs like Cyanogenmod 12, Paranoid Android and more for Micromax Canvas Magnus in near future.

WARNING:
Installing custom recovery on your device may VOID your warranty and may delete all your data.
Before proceeding further you may consider backup your all data.
Understand the fact that you are the only person responsible for everything that you do with you device.
If you blame me for a disaster that happened to your device then I will simply laugh at you.

Before going into details make sure that you have the following things in hand to start with the recovery installation guide.
Required things:
- TWPR custom recovery for Micromax Canvas Magnus A117
- Fastboot and adb binaries (Optional)

Rooting_and_TWRP_Micromax_canvas_magnus
[Installing TWRP Custom recovery and Rooting guide for Micromax Canvas Magnus]

STEP by STEP recovery installation guide for Micromax Canvas Magnus:

STEP 1:
---------
Download the latest recovery file in img format from the above link and copy it in the sdcard.
Access to your phone's console by using adb or terminal emulator app and type the below commands:
$ su
# dd if=/sdcard/recoveryfilename.img of=/dev/block/recovery
That's all. TWRP Custom recovery is installed.
And just make sure that you enter the command right with each and every alphabet correctly typed.

Alternate Guide.

STEP 1:
---------
Install TWRP Manager from the Play Store.

STEP 2:
---------
Open TWRP Manager and provide root permissions.

STEP 3:
---------
Click on Advanced -> Install Recovery

STEP 4:
---------
Verify the correct device name on your screen.
If the correct device is showing then press Install Recovery.

After successfully completing all the above mentioned steps your device will be rooted.

Have fun and stay tuned to get more updates.

[RECOVERY] [TWRP] Official TWRP Custom recovery and ROOTing installation guide for Samsung Galaxy ALPHA (SM-G850F)

A custom recovery is the world to some beautiful custom ROMs for your device.
If you agree with me then you do understand the need of a custom recovery for a device.
Samsung Galaxy ALPHA was recently released to market and today we have the TWRP custom recovery for that.
With this first custom recovery you will also see some custom ROMs like Cyanogenmod 12, Paranoid Android and more for Samsung Galaxy ALPHA in near future.

WARNING:
Installing custom recovery on your device may VOID your warranty and may delete all your data.
Before proceeding further you may consider backup your all data.
Understand the fact that you are the only person responsible for everything that you do with you device.
If you blame me for a disaster that happened to your device then I will simply laugh at you.

Before going into details make sure that you have the following things in hand to start with the recovery installation guide.
Required things:
- Download and install KIES that contains driver for Galaxy ALPHA
- Fastboot and adb binaries
- SuperSU v2.27 Flashable package by chainfire
- TWPR custom recovery for Samsung Galaxy ALPHA
- Samsung ODIN flashing application
- USB cable
- Enough time with a smart and cool brain

You may follow the below link to backup all the data on your android device:
Step by step guide to take full backup of your phone data

Rooting_and_TWRP_Galaxy_ALPHA
[Installing TWRP Custom recovery and Rooting guide for Samsung Galaxy ALPHA]

STEP by STEP recovery installation guide for Galaxy ALPHA:

If you already have ROOT then follow this process to flash the recovery easily.

STEP 1:
---------
Download the latest recovery file in img format from the above link and copy it in the sdcard.
Access to your phone's console by using adb or terminal emulator app and type the below commands:
$ su
# dd if=/sdcard/recoveryfilename.img of=/dev/block/mmcblk0p10
That's all.
And make sure that you enter the command right.

If you don't have ROOT on your phone then follow this below guide.

STEP 1:
---------
Put your phone into download mode.

Press and hold these three buttons until you see a WARNING SCREEN! to enter into the download mode:
Volume DOWN keys + Power key + Home key

When you see the WARNING SCREEN press the volume UP key to continue into the recovery mode.

STEP 2:
---------
Open the ODIN application on your PC.
Connect your phone(while it is still in the download mode) to the PC using a USB cable.
ODIN will show an Added! message on the message box.

ODIN_Device_Added
[Device added on the ODIN screen]

STEP 3:
---------
Click on the AP button on the ODIN application and select the CWM recovery file.

Click_AP_Select_CWM
[Click on the AP button and select the CWM recovery file]

STEP 4:
---------
Select the appropriate options before flashing the recovery image.
only the Auto Reboot and F. Reset Time
Make sure all other boxes are un-checked.

Select_Options
[Select the options]

STEP 5:
---------
Select the start button, which will start the flashing process.
When you get the PASS message, then your phone will reboot automatically.

Start_flashing
[Click on Start and wait till it completes]

You may disconnect your phone and proceed for the next process

Installing the ROOT package using the custom recovery:


NOTE:
Rooting guide will only work after the custom recovery installation.
If you will SKIP the custom recovery installation process and perform only these steps then rooting will not be done.


STEP 1:
---------
Copy the Flashable ROOTing zip file that you have downloaded to your SD card.

STEP 2:
---------
Press and hold these three buttons until you see a WARNING SCREEN! to enter into the recovery mode:
Volume UP keys + Power key + Home key

When you see the WARNING SCREEN press the volume UP key to continue into the recovery mode.

STEP 3:
---------
Select the Install option in the TWRP recovery screen and Select the BETA-SuperSU-v2.27.zip zip file where you have kept in the SD card.
Wait for the flashing to be done and then reboot your phone.

After successfully completing all the above mentioned steps your device will be rooted.

Have fun and stay tuned to get more updates.
[RECOVERY] [TWRP] Official TWRP Custom recovery and ROOTING guide for Google Nexus 6 Codename SHAMU

[RECOVERY] [TWRP] Official TWRP Custom recovery and ROOTING guide for Google Nexus 6 Codename SHAMU

A custom recovery is the world to some beautiful custom ROMs for your device.
If you agree with me then you do understand the need of a custom recovery for a device.
Google Nexus 6 was recently released to market and today we have the TWRP custom recovery for that.
With this first custom recovery you will also see some custom ROMs like Cyanogenmod 12, Paranoid Android and more for Google Nexus 6 in near future.

WARNING:
Installing custom recovery on your device may VOID your warranty and may delete all your data.
Before proceeding further you may consider backup your all data.
Understand the fact that you are the only person responsible for everything that you do with you device.
If you blame me for a disaster that happened to your device then I will simply laugh at you.

Before going into details make sure that you have the following things in hand to start with the installation guide.
Required things:
- Driver for Your Nexus device
- Fastboot and adb binaries
- SuperSU v2.27 Flashable package by chainfire
- Recovery image for your corresponding device from the following links:
      TWPR custom recovery for Nexus 6 SHAMU
- USB cable
- Enough time with a smart and cool brain

You may follow the below link to backup all the data on your android device:
Step by step guide to take full backup of your phone data

Rooting_any_Nexus

[Installing TWRP Custom recovery and Rooting guide for Nexus6]

STEP by STEP ROOTing guide for your Nexus device:

The complete process will be split into three things as following:
- Unlocking the Bootloader
- Installing a custom recovery
- Installing the ROOT package using the custom recovery

Unlocking the Bootloader:

STEP 1:
Turn the phone off.
Then boot it into the bootloader/fastboot mode by holding volume up + volume down + power.

STEP 2:
Open a command console and go to the directory where you have extracted adb and fastboot
Type the following command in the console:
$ fastboot devices

NOTE:
This command will list the connected devices.
If your phones serial number shows up you are good to go and may continue.
If the phone is NOT listed this indicates that your drivers are not installed correctly.
In order for you to continue you must configure your drivers properly so that your phone is listed under fastboot devices.

STEP 3:
If the phone has been recognized by the command above, proceed to unlocking the bootloader with the following command::
$ fastboot oem unlock

WARNING:
Remember that this step will wipe EVERYTHING off the phone.
If you have not taken a backup of your phone data then do it here:
Step by step guide to take full backup of your phone data

Flashing a Custom Recovery:

STEP 1:
Find out the appropriate custom recovery for your device.
Copy the custom recovery into the directory where you have kept the adb and fastboot files.

STEP 2:
Now type the following command to install the custom recovery image onto your Nexus device:
$ fastboot flash recovery <recovery_image_file.name>

Place the recovery image name in the <recovery_image_file.name> field.
$ fastboot reboot

Rooting guide:

NOTE:
Rooting guide will only work only after the custom recovery installation.
If you will SKIP the custom recovery installation process and perform only these steps then rooting will not be done.

STEP 1:
Copy the SuperSu zip file to your SD card(By using a USB cable or via adb push command).

STEP 2:
After copying the SuperSu zip file to your SD card you have to go to the recovery and there you have to install this zip file.
To do so use the following command:
$ adb reboot recovery

STEP 3:
Touch on the Install software button
And then Select a zip file to install.
Select the SuperSu binary zip file where you have kept in the SD card.

After successfully completing all the above mentioned steps your device will be rooted.

Have fun and stay tuned to get more updates.