But out of everything you may not like or need each and every feature.
In this post we are explaining how to control your data usage on an Android phone.
Now a days every single phone gives you e-mail access and every single phone has internet access.
There are so many applications that require internet connection to work, like: Facebook, e-mail applications, google maps and lot more apps.
If your network carrier charges more for your internet usage or you do not require much internet access all the time then you can checkout our guide to know how to minimize data usage on any Android phone.
This guide will save your unnecessary data usage and also it will save your battery usage.
HOW TO TURN OFF BACKGROUND DATA AND AUTO SYNC DATA:
On an Android phone with version greater than 4.0 follow the below steps:
STEP 1:
Goto Settings > Data usage
STEP 2:
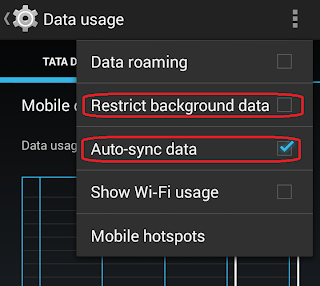
Click on the 3 dots which is there on the upper right side corner as shown in the image.

STEP 3:
If you want to save your data then un-check the "Restrict background data" if it is checked.
Un-check on the "Auto-sync data" option.

This will show you the following pop-up message. Read carefully and click OK.

HOW TO ENABLE OR DISABLE SYNC OPTIONS MANUALLY:
STEP 1:
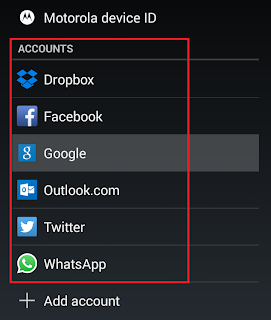
Goto Settings and select your account (Under Accounts section) for which you want to manipulate data sync and other account relevant options as shown in the below image.

STEP 2:
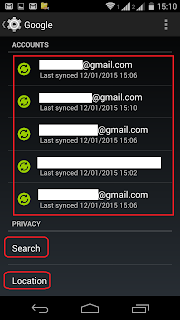
If you have multiple accounts registered lets say under Google accounts then click on the desired account for which you want to manipulate the sync options.
Below image shows multiple Google accounts registered.
If you really wants to save data and more battery charge, then select the "Location" settings and turn off the Location reporting.

STEP 3:
Select on the right side checkbox to enable or disable syncing for that particular option.
Lets say if you want to enable sync the Gmails for the particular gmail account then you can leave the Gmail checkbox ticked as shown in the below image.

Stay tuned to get more of such updates.